15.2. Macintosh OS
To use file sharing from a Macintosh computer, you will need to be set up to use AppleTalk over Ethernet, and to communicate using TCP/IP over Ethernet.
The first step is to choose your Ethernet adapter (usually "Built-in Ethernet" or just "Ethernet") from the AppleTalk Control Panel. If everything is plugged in correctly, the panel should quickly say that no zones were found. If this takes a while, the network cable or network card may not be working properly, and you should see an Apple technician.
To use AppleTalk over TCP/IP it is best that your Mac's network settings are configured via DHCP. The server provides this service, but it must be enabled via the server manager. To enable it on your Mac, choose "DHCP Server" in the TCP/IP control panel. If the control panel asks for a Client ID, simply type in any unique title, such as "Design G4" or "Reception".
| Note | |
|---|---|
|
AppleTalk will work without TCP/IP, but will be slower than AppleTalk over TCP/IP. |
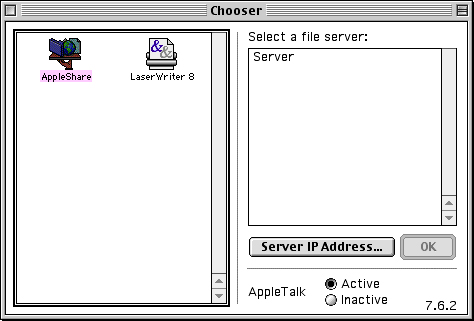
The next step is to choose a server to connect to via AppleTalk. Click on the Chooser icon in your Apple Menu to bring up a list of file servers to connect to.
Double clicking on the server will bring up a list of all the volumes available for you to connect to, whether or not you have sufficient privileges to use them. Your screen should now look like the following picture.
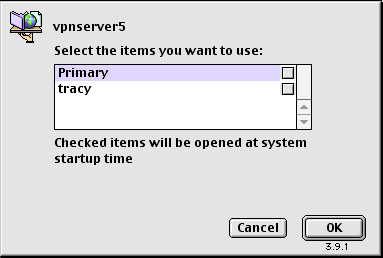
The "Primary" volume is your default area set up by your server for sharing files and the company web site, while "Home directory" points to the specific user's own space on the server, viewable only by that user. While other i-bays may appear, you may not be able to use them, as you must be a member of the group owning that i-bay to use it.
The highlighted volumes are those you wish to connect to. Any ticked volumes will attempt to mount every time you boot your Mac. If you wish to save passwords in a keychain (Mac OS 9.0 or above), you should read the tutorial available from the help menu on your Mac.
Once you have chosen your volumes to mount, whether or not they are ticked, a dialog box will appear to allow you to log in.
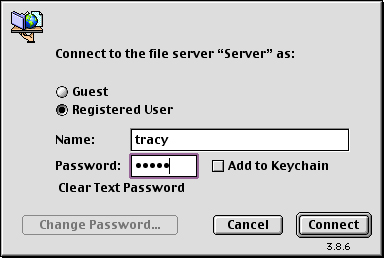
Use your server user name and password to connect. This screen will pop up only once, as the information typed in will be used for every subsequent login. This includes clicking on the Chooser, your server, and then other volumes to mount them as well.
Your desktop should now have icons for each successful volume, such as the icons below:
![]()
MacOS 8.5 or above
![]()
MacOS 7.5 to 8.1
Notice the wire at the bottom of the icon, denoting a network volume.
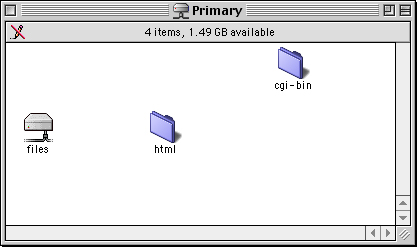
Clicking on one of these icons should show you a window similar to the one below. While you should not be able to add files or folders to this window, you may do so in the files, html or cgi-bin folders (permissions allowing).
| Note | |
|---|---|
|
Some programs may not work well if run from the server. Programs such as MYOB (multi-user accounting software) rely on certain specific nuances to share the same file with multiple other Macs. Test your applications with multiple users before relying on them in this situation. |