16.9. Using Contacts
The server webmail system provides two means of keeping track of e-mail addresses. First, you can have your own Contacts list. Second, you can easily access the company directory that lists all users and groups that have been created.
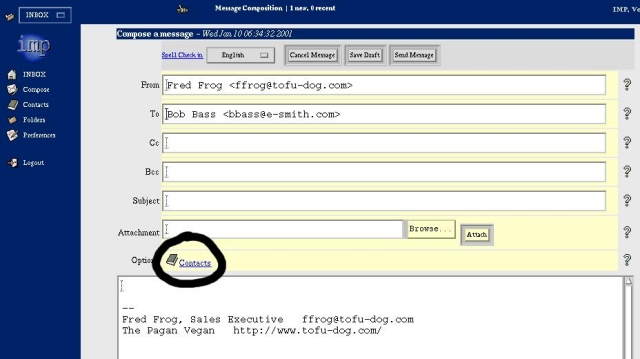
You can view and edit your contacts through two menu choices. From the left menu you can choose Contacts . This allows you to view or edit contacts, but does not allow you to add a contact to an e-mail list. To add a contact, you must open the Contacts window from the "Contacts" link in a Compose window, as highlighted in the image below.
In either case, you will find yourself viewing a window that looks like the one below.
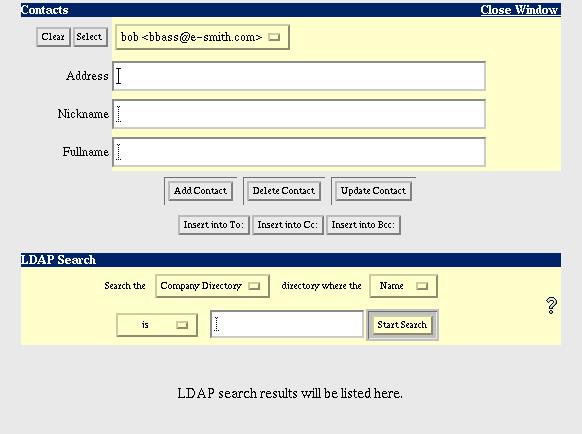
If this is the first time you have entered the Contacts window, you will not see anything next to the "Select" button. Normally, though, you will see a pop-up menu with all of your contacts in it (as seen in the window above where "bob <bbass@e-smith.com>" appears). To enter a new contact, simply type the e-mail address, a "nickname" that will appear in the Contacts list, and the full name of the person. You must fill out all three fields. Then click Add Contact .
To update a contact's information, select the user's name/address from the contacts pop-up menu. The information should automatically appear in the fields. (If it does not, after selecting the entry from the pop-up menu, press the Select button next to the menu.) Enter the new information and click Update Contact . In a similar fashion you can delete a contact by selecting the contact from the pop-up menu and pressing the Delete Contact button.
As mentioned earlier, if you entered the Contacts window from the link in the Compose window, the three buttons - Insert into To:, Insert into Cc:, and Insert into Bcc: - will allow you to transfer the contact information directly into the Compose window.
To search the company directory, use the lower section of the Contacts window labeled LDAP Search [6]. You have the ability to search either the entire name field or just the surname. Enter the text you are searching for in the entry box and choose how you want to compare the text against the directory. The default is to search for entries where the name is the text you enter, which requires an exact match. You may find it more useful to search for entries where the name contains the search text. A search with "contains" will find names where the search text appears somewhere in the name.
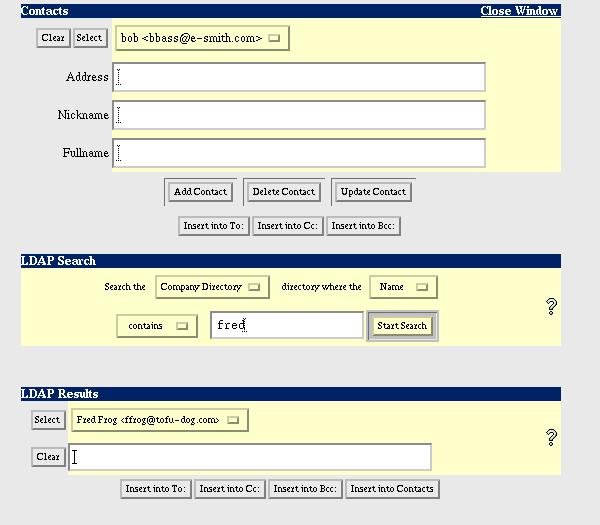
After entering your text and choosing your search options, press the Start Search button to query the directory. As shown in the screen below, your results will be returned in a new LDAP Results section of the same Contacts window. As with the section at the top of the screen, you choose your entry from the pop-up menu (or press the Select button if your entry is displayed already) and the information should appear in the entry box below. Assuming you entered Contacts from the link in the Compose window, you can now insert this information into the To, Cc or Bcc lines of the Compose window.
Note that you also have the option of inserting this entry directly into your Contacts list. If you have a large company directory, you may find this a useful way of ensuring that frequently used contacts are readily available.
| Note | |
|---|---|
|
Unlike your local Contacts list, you cannot directly update entries that are in the company directory. Instead, those entries must be updated by the system administrator using the Directory panel in the server manager. See the Directory section of Chapter 13 for more information. |
[6] The search is called an LDAP search because the directory is queried using the Lightweight Directory Access Protocol (LDAP), one of the most common protocols used on the Internet for searching directories.